Actualités · 12 March 2026
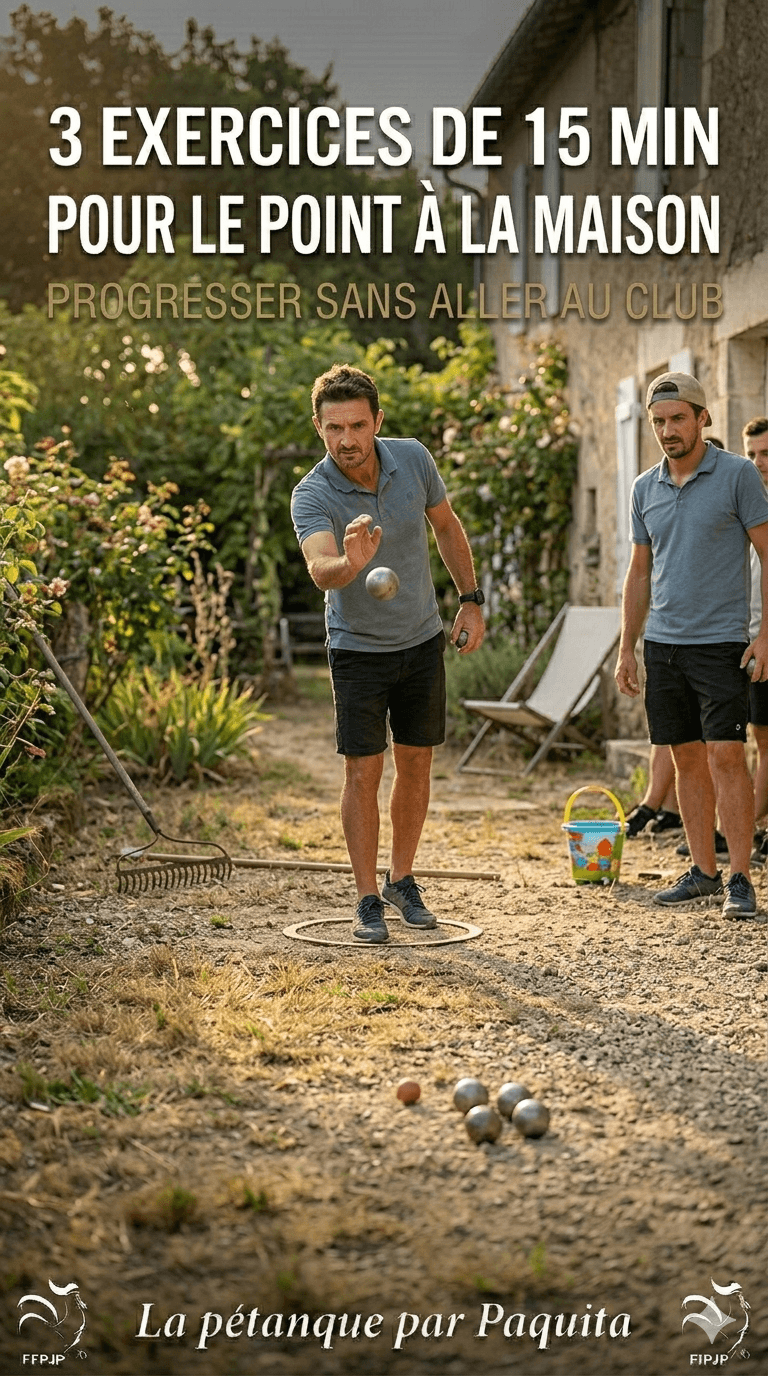
3 fifteen-minute exercises for pointing at home
The pointer progresses between games, not just during. The problem: we can't go to the bowling alley every day. The solution: certain fundamental dimensions of pointing are very well maintained at home - the pendulum gesture, the regularity of release, reading the trajectory. These three 15-minute exercises each target a classic weakness of the amateur pointer. You can do them separately or string them together in a 45-minute session. With or without ballThe 4 fundamentals of pointing — what we really work on
Before getting into the exercises, you need to know why why we do them. A missed point almost always has the same origin — not bad luck, not the terrain, but one of these four gesture faults. Each exercise targets one or two of them specifically.
⏱️ Pendulum consistencyThe pendulum must always travel the same amplitude, at the same speed. An irregular pendulum gives inconsistent distances — even with a perfect release.
✋ Fixed release pointThe boule leaves the hand at the same point in the pendulum's trajectory every time. An early release sends it too far. A late release sends it short or left/right.
🦶 Foot stabilityThe feet do not move during the throw. A foot that lifts on the backswing breaks the axis and deflects the trajectory sideways. The regulation circle makes this fault measurable.
👁️ Fixed aiming pointThe eye must stay fixed on the targeted landing spot, not on the boule or the cochonnet. Looking up at the moment of release is the no. 1 cause of short or long points.
🎙️ Paquita on practising at home "Most pointers think that improving requires a terrain and an opponent. That's wrong for the fundamentals. The pendulum, the release, the vision of the landing point — all of that can be worked on just as well in a corridor as on a dirt terrain. I've seen players who'd trained at home over the winter come back in the spring with a transformed action. Their partners thought they'd been on a course. No — just 15 minutes a day in their living room." — Paquita, on the value of invisible trainingExercise 1 — The blind pendulum
01 The blind pendulum — no boule, no court 📍 Living room / bedroom ⏱️ 15 minutes 🟢 All levels 📦 No equipment 🎯 Goal Anchor a regular pendulum and an identical release point throw after throw, without the distraction of the boule and the result. We work on the pure technique, dissociated from the anxiety of the result. 3 min Warm-upslow pendulums 8 min Pendulum sets
eyes closed 3 min Eyes open
with marking 1 min Analysis
feel
Starting position: standing, feet slightly apart (shoulder-width), in the position that will be yours in the circle. Arms alongside the body, playing hand empty or holding an object of the same weight as a boule (a sealed 700ml bottle for example).
Mentally map out your release point: identify the point in the pendulum's trajectory where your hand reaches exactly the height of your knee. That's where the boule leaves the hand at most distances. Mentally repeat this point before you start.
10 pendulums with eyes closed: close your eyes, perform 10 complete pendulums (back + forward) focusing all your attention on the feel of the release. Release the tension in your fingers at exactly the same moment each time. Note whether the feel changes from one throw to the next.
30-second break + analysis: open your eyes. Did the release feel the same on each repetition? Too early? Too late? Mentally adjust before the next set. Do 3 sets of 10 repetitions.
Last 3 minutes — eyes open, marking: place some tape or an object on the floor 4-5 meters in front of you. Repeat the pendulum aiming at this marking, with eyes open this time. The target is not to be hit — it serves only to fix your gaze in the right place during the swing.
↳ Variations- Do the exercise in front of a mirror to observe the consistency of the pendulum sideways
- Film from the side with your phone and review the last 10 throws — irregularities invisible to the naked eye show up on video
- Do the sets holding a real boule if space allows (at least 3m of ceiling height)
- Advanced level: do pendulums in pairs, the other watches you and indicates whether the release varies
The brain preferentially uses visual information to guide movement. By closing your eyes, you force it to rely on proprioceptive memory (the internal sensation of the body in space). It's this muscle memory that works under pressure in competitions — when the eyes are distracted by the opponent, the score or the terrain. Training it blind makes it available in all conditions.
Exercise 2 — The release line
02 The release line — accuracy without distance 📍 Hallway or garden ⏱️ 15 minutes 🟡 Intermediate 📦 1 boule + tape or rope 🎯 Goal Eliminate the lateral deviation of the point. The boule must land on an imaginary line stretched between you and the target — not to the right, not to the left. It's the most common fault among pointers who have good "depth" technique but lack precision on the axis. 2 min Setupof the line 10 min Sets on
the line 2 min Test without
the line 1 min Counting
score 📐 SETUP — TOP VIEW C Circle sighting line Target 5 to 7 meters Throwing circle Target Sighting line (rope/tape)
Setup: stretch a string or place a strip of tape on the floor over 6 to 8 meters, in a straight line. Place your target (cochonnet, cork, lid) at one end of the line. Your throwing zone is at the other end — feet on either side of the line, not on it.
Exercise rule: the boule must touch the line or pass within 10 cm on either side along its entire rolling trajectory. No need to land close to the target — only the lateral axis counts. A precise point that stops 1 meter short but on the line is worth more than a point close to the target but 30 cm off.
Sets of 6 boules: throw 6 times from the same position. Count how many boules stay within 10 cm of the line. Collect the boules, analyze the deviations (always to the right? always to the left?) and adjust your shoulder axis before the next set. Do 4 sets.
The last 2 minutes — remove the line: remove the string or hide the tape. Point at the target alone, with no visual guide on the ground. The 10 minutes of work on the axis have recalibrated your lateral proprioception — the line will be mentally present even without the physical marker.
↳ Variations- Reduce the tolerance corridor from 10 cm to 5 cm when 5 out of 6 boules regularly pass within 10 cm
- Change the distance: start at 5 meters, progress up to 8 meters when the score is stable
- Two-person exercise: one throws, the other measures the deviation and calls it out. Immediate feedback speeds up correction.
- On outdoor terrain: replace the string with a line drawn with your foot in the dirt
Constant lateral deviation in the same direction is often a matter ofshoulder alignment. If the boule consistently deviates to the right, your right shoulder is too open at the moment of release. If it deviates to the left, it's the opposite. The line exercise lets you visualize the pattern and correct it consciously before it becomes automatic.
Exercise 3 — The shrinking target
03 The shrinking target — creating competition pressure 📍 Garden or terrain ⏱️ 15 minutes 🟠 Advanced 📦 3 boules + cochonnet 🎯 Goal Train precision under pressure by progressively shrinking the success zone. When you can point into a 20 cm circle at 7 meters, pointing "close to the cochonnet" in a real game feels easy. It's the exercise that turns a good pointer into a reliable pointer. 3 min Distancecomfort (6m) 8 min Target sets
shrinking 3 min Final sprint
best score 1 min Rating
session 📐 SETUP — 3 CONCENTRIC ZONES C Zone A Zone B Zone C 7 to 9 meters Zone A: 50 cm — 1 pt Zone B: 30 cm — 2 pts Zone C: 15 cm — 3 pts Cochonnet
Setting up the zones: place the cochonnet between 7 and 9 meters. Mark out three concentric circles around it with chalk, tape, or simply by memorizing landmarks on the ground. Zone A: 50 cm radius (1 point). Zone B: 30 cm radius (2 points). Zone C: 15 cm radius (3 points). The boule must stop in the zone — if it continues and goes out, it counts the zone where it stops.
3 boules per end, 5 ends: throw 3 boules from the circle, count the points according to the landing zone. Note the score. After each end, move the cochonnet to a new position (slightly different distance and angle) to avoid playing the same shot repeatedly — in a game, the cochonnet is never in exactly the same place.
The pressure rule: set yourself a minimum score to reach over 5 ends (e.g. 18 points out of 45 possible). If you don't make it, you redo the end — not the whole session, just the failed end. This small simulated pressure activates the same nervous mechanisms as an important shot in competition.
The last 3 minutes — personal record: on the last 3 ends, aim for your best score of the session. Note it. At each new session, this record is your goal. Progress becomes measurable and motivating.
↳ Variations- Reduced garden version: replace the cochonnet with a box lid at 5 meters and shrink the zones proportionally
- Competition version: two players face off on the same ends, each with their 3 boules — the opposing pointer creates real pressure
- Progressive distance version: start at 6 meters, add 50 cm each session up to 9 meters
- Vary the angle of attack: rolling point, lofted point, diving point — note the score per technique
A pointer who regularly places within 15 cm of the cochonnet in practice — Zone C — is a pointer who will be feared in a game. Why? Because 15 cm is the distance at which the opposing shooter must be precise to knock you out. Below that, they take risks. Above that, they shoot comfortably. Your long-term goal: 2 boules out of 3 in Zone C. That's what forces shooters to shoot.
Suggested weekly planning
The three exercises are complementary but don't necessarily have to be done on the same day. Here is a weekly breakdown that lets each practiced motion take root before the next session.
MON 🔵 Exercise 1Pendulum
blindfolded TUE 😴 Active
recovery WED 🟢 Exercise 2
Line of
release THU 😴 Active
recovery FRI 🟠 Exercise 3
Target
shrunk SAT 🔵 Exercise 1
(optional) SUN 🏆 Game
or competition ⚠ Don't multiply the repetitions
The temptation is to do "two sessions back to back" or to double the repetitions to progress faster. It's counterproductive. Muscle memory takes root during the rest between sessions, not during the effort. 15 well-focused minutes every two days are worth more than an hour of mechanical repetitions the day before a competition. Active recovery between sessions is part of the training.
- ✅Start with exercise 1 if you are a beginner or if you are starting again after a long break — it requires no outdoor space and builds the basic sensations without the stress of results.
- ✅Move on to exercise 2 when exercise 1 feels consistent to you — about after 2 to 3 weeks. The lateral axis is the second fault to correct after pendulum consistency.
- ✅Exercise 3 last — the shrunk target requires the fundamentals to already be relatively in place so that the simulated pressure is useful rather than frustrating.
- ✅Keep a scorebook — recording the score of each session lets you visualize your progress and maintain motivation between real games. Progress in pointing is often slower than in shooting, but it is more durable.
FAQ — Your frequent questions
Can we really improve at the point without playing on a real field? + For the fundamentals of the gesture, yes. The muscle memory of the pendulum, the release and the axis does not require formal terrain — it is forged in the repetition of the movement under stable conditions. What the field provides and that the house does not replace: reading rebounds, adapting to varied surfaces, and mental management when facing a real opponent. Home exercises work on the mechanical base; the real part applies this basis to changing conditions. Both are necessary, both complement each other. Do these exercises work for shooting too? + Exercises 1 and 2 are adaptable to shooting, with modifications. The blind pendulum drill works very well for the shooter — the swinging motion and release point are equally critical. The release line drill is suitable with a fixed target at actual shooting distance (6–9 meters). Exercise 3, on the other hand, is specific to pointing in nature. For shooting, an equivalent exercise would be the ball target: shoot at a ball placed at a variable distance and count the hit/attempt ratio. What minimum equipment to do the three exercises in an apartment? + Exercise 1 requires zero materials — just space for a pendulum (1.5 meters high and 2 meters wide is enough). To simulate it without a ball, a 700ml bottle of water with a weight similar to a ball does the trick very well. Exercise 2 in an apartment can be done in a hallway with a string placed on the floor and a target object — you don't throw the ball but you make the gesture and observe where the hand is pointing. Exercise 3 requires an outdoor space 9 to 10 meters long. How often should you practice these exercises to see some difference? + Two to three sessions per week are more than enough — even better than five. Motor memory is anchored during rest phases, not accumulation. A quality session every two days gives visible results in 3 to 4 weeks. The first partially perceptible changes generally appear after 3 weeks of regular practice: fewer "inexplicable" failures, more regularity over the usual distances. Progress then becomes slower but more solid. Should you do these exercises with your real competition balls? + Ideally, yes. Muscle memory calibrates to the specific weight and grip of your triplet — training the movement with different balls creates a partial adaptation that will have to be unlearned in competition. If you cannot use your balls indoors, opt for the pendant-without-ball (exercise 1) rather than using a substitute material that is too different. Outdoors, always use your real balls for exercises 2 and 3. 📖 PAQUITA’S BOOK Want to go even further?These exercises are a taster. Paquita's book brings together the complete method for improving your pointing, shooting and mental management — whether you're a beginner or a competition player.
📦 Order on Amazon 📎 Related articles Equipment Choosing your pétanque boules — 2026 guide Rules The throwing circle — rules and foot position Video Why changing bowls does not change your level Equipment Stainless steel vs carbon boules — which one for your style? Tools Free tools — draw generator and more PétanqueLand All the petanque news — PétanqueLand© Pétanque by Paquita — petanqueland.fr · 📖 Paquita's book on Amazon
These exercises are based on the principles of motor memory applied to precision sports. Adapt the distances and the zones to your starting level — progress should be gradual, not frustrating.